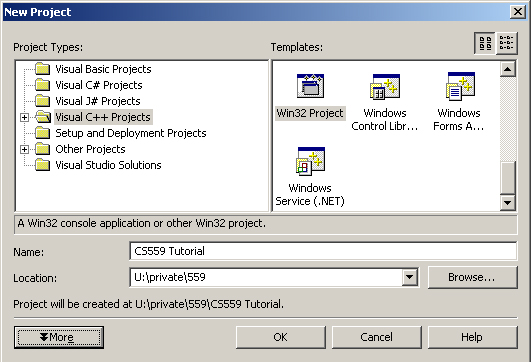
Choose File -> New -> Project from the VS03 menus. You should get this dialog box. We wish to create a Win32 Project (chosen from the templates on the left side). Set the location to someplace on your U drive and give the project a name, in this case CS559 Tutorial. Click OK. |
|
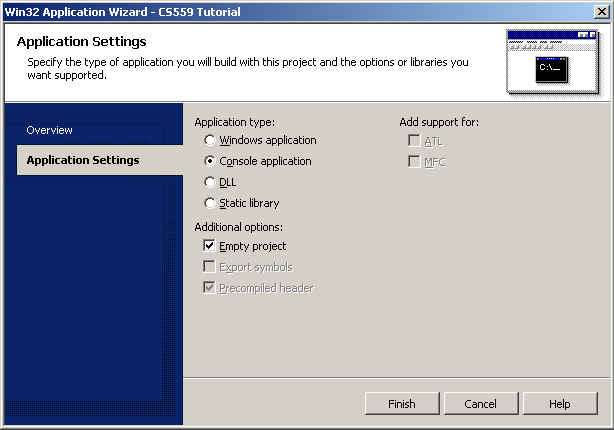
Go to the Application Settings tab. Make sure Console application and Empty project and selected. Click Finished. |
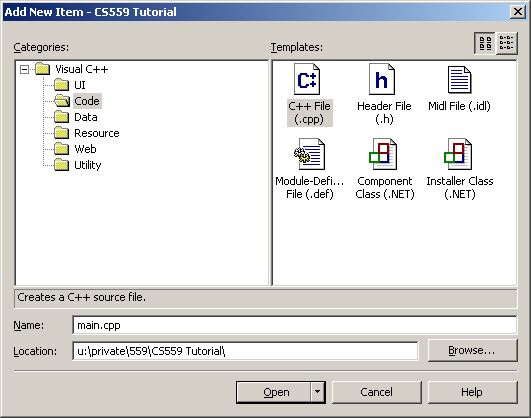
Choose File -> Add New Item from the VS03 menus. We want a C++ source file so choose the Code category and C++ File (.cpp) from the available templates. Enter a name for our source file, main.cpp in our case. The location should already be under the project you've created. Click Open. You should now see a blank source file in the editor titled main.cpp. Lets add a window to VS03 to make navigating our project easier. From the View menu choose Solution Explorer. All windows in VS03 can be docked or hidden as you'd like so feel free to drag this new windows to a location that is accessible but does not block your view of the main source window. The Solution Explorer shows you a tree representing your current solution. Solutions are made of one or more projects, which in turn are composed of one or more files. We currently have one project in our solution, namely CS559 Tutorial. Which currently has a single file main.cpp under Source Files. |
#include
<iostream> |
I'm not going to explain this code as you are expected to have a
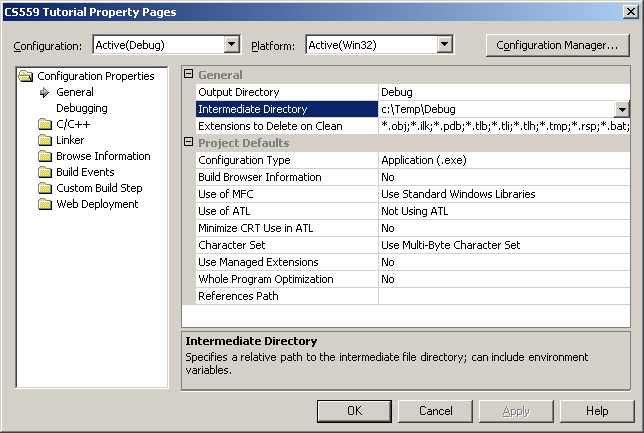
working understanding of C++ for this (and all future) tutorials.Unfortunately there are currently some issue with VS03 and AFS (the unified file system used by the department). VS03 creates some temporary files when compiling programs and AFS is currently preventing this from happening. So to remedy this situation we're going to have VS03 put the temporary files on the local drive. These files will be lost when you logout but they're only temporary files anyway so that's ok. Open the Class View window, right click on our project CS559 Tutorial and choose Properties. Select General from the left hand pane and set the Intermediate Directory to C:\Temp\Debug. The intermediate directory will have to be set in this manner for all projects you create in VS03. Click OK and we're all set to compile our project. |
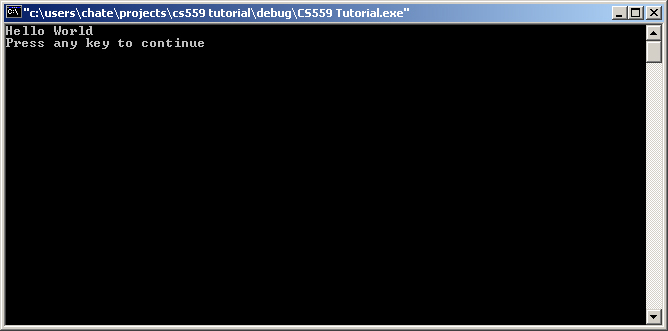
To run our program from within the VS03 enviroment we simply choose Debug -> Start Without Debugging. You should see this console window appear. Congratulations! You've got your first successfull VS03 project. |