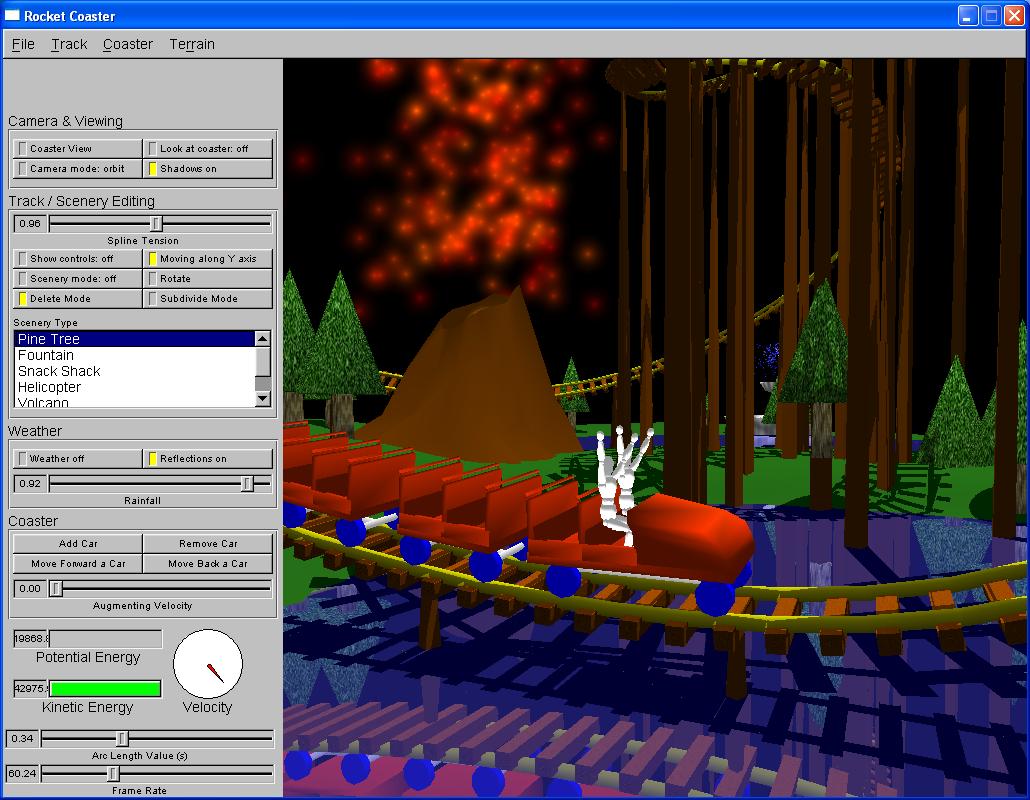
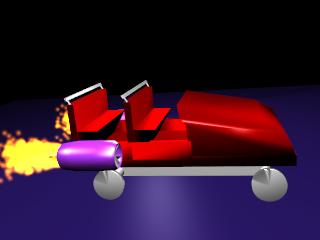
Rocket Coaster
Marcin Szymanski and Andrew Selle

Introduction

Rocket Coaster was written for project #2 of CS 559 (the Intro Graphics course at UW-Madison). The requirements were that we have a track, a train that moves on it, and a scenery object. We decided to take the project a few steps further. In particular, we sought to have a richer virtual environment. We paid attention to the look of our tracks, coaster, scenery and terrain.

Some features of note are listed here. First, our roller coaster has wheel trucks that can rotate independently in the front and back. Then the coaster model is placed atop these on a "platform." This makes the train look much more realistic when it goes through turns and bends. We also have stenciled shadow volumes, which provides for things like object-object shadows and self-shadowing. The algorithm used to calculate water placement is also general and works quite well (make any terrain and see where the water lands!). Our models were made in Blender, and we exported them to a custom text file format with a python exporter we wrote. Finally, the world is reflected in the water, which was accomplished with more help from the stencil buffer.

We note that the project is normally assigned to individual students. We took part in the honors group and were allowed to work in a group of two.

Images

Screenshot 1 (Volcano in Background) (140 KB)
Screenshot 2 (Survivor Mode) (54 KB)
Screenshot 3
Splash (15 KB)
Rendered Coaster (158 KB)

Download

System Requirements

We don't recommend running this on anything less than a Pentium III 500 MHZ with a GeForce DDR. We developed the program on AMD Athlon 1.4 GHz machines with GeForce III's. Without these video cards, it will still run, but shadows and reflections (which require higher fill rates, more overall graphics horsepower, and special features like the stencil buffer) will not run well, if at all.

You need to be running Windows 95 or higher, and you must have OpenGL on your system.

Installation

Simply unzip the program into the directory of your choice. Then run the p2.exe binary.

Archive

Win32 (binary + data): rocket.zip (1.3 MB)

Documentation

Contents

  1. Using The Camera
  2. Creating And Editing A Track
  3. Editing The Coaster
  4. Playing With Scenery
  5. Terrain
  6. Special Effects
  7. Features Of Note
  8. Acknowledgments

1 Using The Camera

Move the mouse while holding the right mouse button to orbit the camera around the origin. The middle mouse button is used to zoom in and out on the origin.

You can click on the "Camera mode" button to toggle between orbit mode and panning mode. In panning mode, you can free-look around the world with a stationary eye-point. To pan around, use the right mouse button. You can zoom in and out just like in orbit mode by using the middle mouse button.

Also, you can click on "Look at coaster" to have the camera follow the coaster as it moves along the track.

Finally, you can click on "Coaster view" to take a ride on the roller coaster itself.

2 Creating And Editing A Track

When the program is first run, a pseudo-circular track with four control points is automatically created. These control points can be displayed by clicking on the "Show controls" button. To create additional control points, click somewhere on the screen. You can also go into "Subdivide mode" by clicking on the appropriate button. If you now click on a control point, a new control point will be created halfway between it and the next one.

To move control points, click on them and drag them around the screen. You can toggle XZ plane movement vs. Y-axis movement by clicking on the appropriate button. Make sure you're not in a special mode (such as Scenery mode).

To rotate control point normals, click on "Rotate". Then, click and drag on any control point to rotate its normal about the tangent at that part of the curve.

You can also load *.rol files from disk by clicking on File -> Load. These files contain specifications for a complete roller coaster track. Clicking File -> Save allows you to save your track to a file of your choosing.

The track can be calculated from two different types of cubics: B-Splines and Cardinal splines. To change the kind you want to use, click on Track and select the type of curve you want to use.

Finally, you can toggle arc-length parameterization. When this is on, the real-world length of the cubic is used to determine how far to advance the coaster during each update. This allows for things like constant velocity and conservation of energy. (This is on by default)

3 Editing The Coaster

You can change the number of cars in the roller coaster by clicking on the "Add car" and "Remove car" buttons.

The Coaster menu contains some other functions. You can stop the simulation altogether, and you can toggle conservation of energy (as well as the displays that come with it).

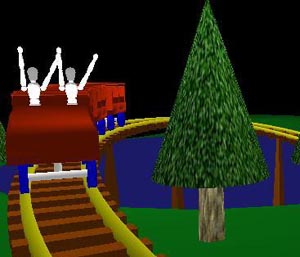
4 Playing With Scenery

There's a variety of scenery objects that you can play around with in the program. To select the kind of scenery object you wish to place, click on its name in the scenery list box. Then, click on "Scenery mode" and start adding scenery. This is done by clicking somewhere in the main window.

You can exit scenery mode and move the scenery objects around just as you did for control points. You can also rotate them about the Y-axis.

If you wish to delete any scenery objects, click on "Delete". Then, click on any scenery objects that you wish to delete.

5 Terrain

To change the current terrain, click on Terrain -> Creation. You will be presented with four options. Select one of the options by clicking on its radio button, fill in any necessary attribute fields, and click on "Create" to make the terrain. The four creation types are described below:

  • Initialize: creates a small, flat terrain
  • Generate random: creates a randomized terrain. You can control the terrain that it generates by inputting values into the attribute fields. Width and Depth control how many height-field cells will be generated along the two axes of the terrain. Scale is used to modify how much the terrain is "stretched" horizontally, and should not be made too large or small (values of 0.1 to 10.0 are okay). Finally, Min height and Max height control the range of world height values that the terrain can have.
  • Load ASCII: loads a *.ter terrain file. You can type in a pathname or browse to the file by clicking Browse.
  • Load TGA: loads a *.tga terrain file. The red channel is used to determine the height-field values. Again, you can type in a pathname or browse for it by clicking Browse.

Terrain can also be modified in a variety of ways. This functionality is accessed by clicking on Terrain -> Modification. The four ways to modify terrain are described below:

  • Add random layer: adds a random amount to each height-field cell. The amount is bounded by the specified Min and Max.
  • Set new height range: rescales the terrain vertically to fit within the specified world y-coordinates Min and Max.
  • Set new horizontal scale: rescales the terrain horizontally by the specified scale factor (e.g., 2.0 means that the terrain will take up twice as much space along the X and Z dimensions while maintaining its height-field width and depth).
  • Fractal subdivide: performs fractal subdivision on the terrain. You can specify the range of the random values that will be added to each newly created point. Please note: the resulting terrain's dimensions will each be doubled (approximately), so don't do this if your terrain is already at a high resolution.

6 Special Effects

There are a few other interesting things you can do with the program. These are categorized below.

  • Weather: If you turn on Weather, rain will start to fall. This, in turn, will cause water to start pooling up on the terrain. You can make it rain harder by moving the slider to the right, or you can move the slider to the left to decrease the rainfall.
  • Reflections: If you turn on reflections, any existing water will reflect the scene. Every pool of water will reflect the scene, but the number of reflection passes is limited (for speed reasons), which means that some reflections might not be totally accurate. (Note: you need a fairly good PC with a good video card if you want to turn this feature on, e.g., at least a P2-400 and a TNT2 video card)
  • Shadows: You can turn on shadows for the entire scene. The shadows should look correct on arbitrary terrain, and objects will cast shadows on other objects and even self-shadow.

7 Features Of Note

This is a list of some of the cooler features that we implemented for this project, grouped by type:

  • Realtime simulation
    • proper 3D orientation of coaster (can do loops)
    • individual sets of wheels are modeled and adhere to track.
    • conservation of energy
  • Graphics routines
    • stenciled shadows via shadow volumes (with customizable submission of shadow caster polygons on a per-object basis)
    • stenciled reflections (multiple reflection passes per frame with an auto-adaptive algorithm to optimize drawing efficiency)
    • particle system (customizable via plug-ins)
    • cartoon-style scenery addition/deletion
    • coaster splashes when it goes through pool of water
  • Special algorithms
    • runtime computation of catchment areas in arbitrary terrain
    • arc-length integral tessellation reverse mapping lookup table (speed optimization for arc-length interpolation algorithm)
    • binary search algorithm for real distance (vs. mole distance) (used for doing individual wheel bases and multiple cars)
    • up-vectors generated via pseudo-secondary spline defined by control points that are pi + ni where pi, ni is a vector, and pi is the original control point vector
  • External file format support
    • Python script for exporting models from Blender to our format
    • support for loading models, terrain, and coaster tracks from a variety of file types
    • texture manager reads TGA files using CS559 Project 1 code
  • Other
    • robust UI
    • tons of speed optimizations (drawing, simulation, etc)
    • variety of camera modes
    • generalized structure for OpenGL picking (via a custom OpenGL Name Manager class)

8 Acknowledgments

A portion of the source code and resources for this project came from outside sources. We have listed below the areas where we used other people's work along with proper attribution.

  • Stencil algorithms - Stephen Chenney's CS638 course notes
  • 3D selection and movement - Mark Pingel's 3DGL code
  • Helicopter Model - from http://www.blender.nl/python/uvcoords.html By Jan Walter of NaN.
  • Annotated Person Model - http://www.meloware.com/blender/ from meloware.com (author unknown)
  • Campfire (campfire.mod) model courtesy of the Blender Tutorial disk from the Blender Book from NaN.

Last Modified March 11, 2002