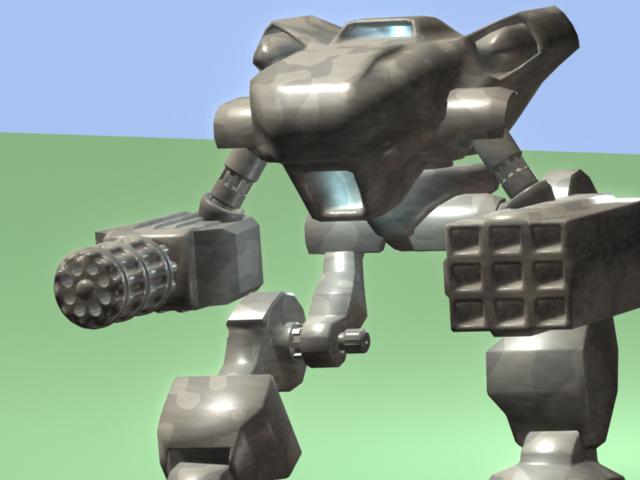
The
mech was boned and skinned in the usual fashion.IK
handles were added to its feet to control its leg, and also to its arms.IK
handles were also added to each of its foot appendages to control where
they point to.
Then
I used Maya?s expressions to control the various joints of the mech.I
used one expression for each of the foot?s appendages so that they would
always point downward when it raised its foot, to simulate the force of
gravity.This couldn?t be done with
simple parenting, because I wanted the IK handle of the appendage to be
parented to the movement of the whole foot, but only in terms of its X
and Z coordinates.I wanted the IK
handle?s Y coordinate to always be 0 so the foot appendage would always
be pointing at the floor.But since
all the appendages were grouped as a ?foot? node, all the IK handle?s translation
attributes are always 0, since it is the group that is moved when moving
the leg.Many methods of grouping
and parenting were attempted, but none worked.So
to make each foot appendage point to the ground, I wrote an expression
to assign to the Y coordinate the negative value of the group?s Y coordinate;
this way, they would cancel each other out and the IK handle will always
effectively be at Y = 0.
//controls
right foot appendages
ik_right_toe.translateY
= -rfootc.translateY;
ik_right_ball.translateY
= -rfootc.translateY / 2;
ik_right_heel.translateY
= -rfootc.translateY;
ik_right_wing_left.translateY
= -rfootc.translateY;
ik_right_wing_right.translateY
= -rfootc.translateY;
//controls
left foot appendages
ik_left_toe.translateY
= -lfootc.translateY;
ik_left_ball.translateY
= -lfootc.translateY / 2;
ik_left_heel.translateY
= -lfootc.translateY;
ik_left_wing_left.translateY
= -lfootc.translateY;
ik_left_wing_right.translateY
= -lfootc.translateY;
Next,
I wanted to automate the secondary animation of the mech so that its various
parts would bounce accordingly along its walk cycle.I
added custom attributes for the torso?s up and down bounce and tilt, its
side to side bounce tilt, and its forward and backward shifting.I
also added attributes for its arms bouncing, its legs lifting and forward
and backward movement.I then used
expressions to link all of these to a ?Walk_Cycle? attribute, so that when
I slid this attribute, the mech would walk in place.I
also added custom attributes ?Stride_Length,? which affects how big the
mech?s stride is, and ?Speed? which just affects the apparent bounciness
of the mech (not the distance covered).Stride_Length
was also rigged to control the bounciness of the torso and arms, because
a larger stride should effect more secondary motion.The
Speed control made the mech much bouncier at higher speeds.Also,
since the motions of the legs at a slow walk and a full run are vastly
different (when running, there are times when both feet are in the air,
which is not the case when walking), two different motion curves were created
at each extreme, and interpolated between using the Speed attribute.Expressions
were the mechanism by which I linked the two different animation curves
and the Speed and Stride_Length attribute to the Walk_Cycle attribute,
which was linked to the actual IK handles using the Set Driven Key tool
in Maya.
mech_control.RFStride_h
= ((mech_control.Speed / 10) * mech_control.RightFootStrideRun * (mech_control.StrideLength
/ 40)) +
(((10
- mech_control.Speed) / 10) * mech_control.RightFootStride * (mech_control.StrideLength
/ 40));
//foot
lift due to stride forward
mech_control.LFL_h
= ((mech_control.Speed / 10) * mech_control.LeftFootLiftRun * (.1 + mech_control.StrideLength
/ 80) * (1 + mech_control.Speed / 10)) +
(((10
- mech_control.Speed) / 10) * mech_control.LeftFootLift * (.1 + mech_control.StrideLength
/ 80) * (1 + mech_control.Speed / 10));
mech_control.RFL_h
= ((mech_control.Speed / 10) * mech_control.RightFootLiftRun * (.1 + mech_control.StrideLength
/ 80) * (1 + mech_control.Speed / 10)) +
(((10
- mech_control.Speed) / 10) * mech_control.RightFootLift * (.1 + mech_control.StrideLength
/ 80) * (1 + mech_control.Speed / 10));
//foot
lift due to strafe left/right
$strafe_liftL
= 0;
$strafe_liftR
= 0;
.O[4]
= .I[10];
.O[5]
= .I[11];
mech_control.HRUD_h
= mech_control.HipsRaiseUD * (mech_control.StrideLength / 40) * (mech_control.Speed
/ 5) + mech_control.Speed - 1;
mech_control.HTUD_h
= mech_control.HipsTiltUD * (mech_control.StrideLength / 40) * (mech_control.Speed
/ 10);
mech_control.HLLR_h
= mech_control.HipsLeanLR * (mech_control.StrideLength / 40) * (.25 + mech_control.Speed
/ 40);
mech_control.HSLR_h
= mech_control.HipsSwayLR * (mech_control.StrideLength / 40) * (.75 + mech_control.Speed
/ 40);
mech_control.HSFB_h
= mech_control.HipsSurgeFB * (mech_control.StrideLength / 40) * (.25 +
mech_control.Speed / 20) + mech_control.Speed - 1;
mech_control.ArmBounce_h
= mech_control.ArmBounce * (mech_control.StrideLength / 40) * (mech_control.Speed
/ 10);
mech_control.HLookLR_h
= mech_control.HipsLookLR * (mech_control.StrideLength / 40) * (mech_control.Speed
/ 10);
mech_control.TLLR_h
= mech_control.TorsoLookLR;
For easy testing,
I next rigged the mech?s walk cycle to the frame number.This
was so I could just press the play button and the mech would walk/run in
place.I used an expression to relate
the frame time to the walk cycle.Using
this, the apparent speed of the mech could be easily seen.Not
only was the mech bouncier at higher speeds, it took more steps in the
same amount of time as it would?ve at lower speeds.
The next part was
rigging the mech so that its walk cycle would be automatically generated
based on its position and rotation.This
used trigonometry to figure out how much it was going forward based on
both its heading and its bearing, and then related it to the Walk_Cycle
attribute, which was looped over and over using the modulus of the distance
covered.Using this technique, there
is no footslip while the mech is walking.The
Speed and Stride_Length attributes worked well in this case too.But
the Speed now only controlled how bouncy the mech looked.It
was the distance covered by the keyframing that would control the speed
of the mech, or the number of steps it took in a certain amount of time.I
also had to incorporate reference positions and rotations, because you
just cannot measure the distance traveled from the origin, since the mech
will be rotating and such.
This approach had
a few other shortcomings.The mech?s
automatic motion only looks good when walking in a straight line.There
is no consideration of side-stepping or rotating while walking, so that
if the mech is not keyframed in a straight line, there will be lateral
footslip.I feel that, if given more
time, I could have at least implemented the side-stepping by incorporating
a Side_Step_Cycle attribute, much like the Walk_Cycle attribute.Then
I would interpolate between the two based on the differences between the
angles of its heading and its bearing.Also,
to avoid longitudinal footslip, there were constraints put on the animation
curves of the mech?s feet so that it would be linearly aligned with the
distance traveled.This causes a
slightly less than realistic motion, because I couldn?t adjust the feet?s
curves to have slow in and out tangents, because there were no tangents
for the overall motion of the mech body.
$bearing_dist
= sqrt(pow(mech_control.translateX - mech_control.RefPosX, 2)
+
pow(mech_control.translateZ - mech_control.RefPosZ, 2));
if
($bearing_dist != 0) {
$bearing_dist
*= mySign(mech_control.translateX - mech_control.RefPosX)
*
-mySign(mech_control.translateZ - mech_control.RefPosZ);
if
(mech_control.translateX - mech_control.RefPosX < 0)
$bearing_dist
= -$bearing_dist;
$bearing_angle
= acosd((mech_control.translateX - mech_control.RefPosX) / $bearing_dist);
$heading_angle
= mech_control.rotateY;
$angle_between
= $bearing_angle - $heading_angle;
$heading_dist
= $bearing_dist * cosd($angle_between);
mech_control.one_cycle
= fmod(mech_control.one_cycle + ($heading_dist * 24 / (mech_control.StrideLength
* 2)), 24);
}
mech_control.RefRotY
= mech_control.rotateY;
mech_control.RefPosX
= mech_control.translateX;
mech_control.RefPosZ
= mech_control.translateZ;
Overall, I think the
technical piece was a great success.I
had tried many alternatives to reach a certain goals, and finding the right
method out of many seemed to be the critical lesson learned.